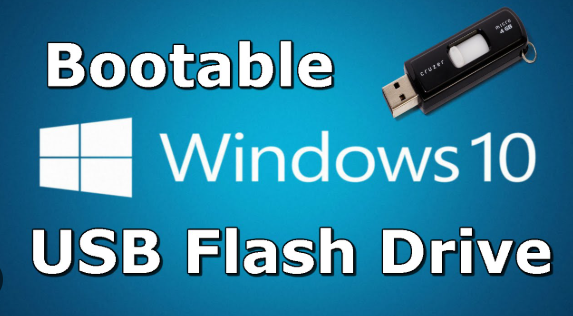
Creating a bootable USB drive for Windows installation is one of the most important tasks for users who want to install or reinstall Windows on a PC. Whether you are upgrading, performing a clean install, or fixing a corrupt system, having a bootable USB drive makes the process smoother, faster, and more reliable than using traditional DVDs.
This detailed guide will walk you through everything you need to know about creating a bootable USB drive for Windows installation, from the tools you’ll need to detailed step-by-step instructions and troubleshooting tips.
1. Why Use a Bootable USB for Windows Installation?
A bootable USB drive is a USB flash drive that has been formatted and loaded with the necessary files to boot and install an operating system. Here are a few reasons to use it for Windows installation:
-
Speed: USB drives install Windows faster than DVDs.
-
Portability: Easy to carry and reuse.
-
Versatility: Works on most modern computers, including laptops without DVD drives.
-
Reliability: Less prone to physical damage compared to optical discs.
2. Prerequisites for Creating a Bootable USB
Before you begin, ensure you have the following items and information ready:
Hardware Requirements
-
A USB flash drive with at least 8 GB of space (16 GB or more is preferred).
-
A Windows PC to prepare the bootable USB.
Software Requirements
-
A Windows ISO file (can be downloaded from Microsoft’s official website).
-
A tool to create the bootable drive (Media Creation Tool, Rufus, or command line).
System Requirements
-
Windows 7, 8, 10, or 11 ISO depending on what version you wish to install.
-
Administrative privileges on the computer you’re using to create the USB.
3. Methods for Creating a Bootable USB
There are several ways to create a bootable USB drive for Windows installation. We’ll go through the most common and effective methods.
Method 1: Using Microsoft’s Media Creation Tool (Recommended for Windows 10/11)
Microsoft provides an official tool that simplifies the process for end users.
Step-by-Step Guide
-
Download the Tool
-
Visit Microsoft’s official download page.
-
Choose the version of Windows you need and download the Media Creation Tool.
-
-
Run the Tool
-
Launch the tool as an administrator.
-
Accept the license terms.
-
-
Choose Your Option
-
Select “Create installation media (USB flash drive, DVD, or ISO file) for another PC.”
-
Click Next.
-
-
Select Language, Edition, and Architecture
-
Choose the appropriate settings (or use recommended options).
-
Click Next.
-
-
Choose Media Type
-
Select USB flash drive.
-
Click Next.
-
-
Insert USB Drive
-
Insert your USB drive and select it from the list.
-
Confirm and click Next.
-
-
Download and Create
-
The tool will download the required files and make your USB bootable.
-
Once complete, click Finish.
-
Pros:
-
Official and easy to use.
-
No manual formatting needed.
Cons:
-
Limited to Windows 10 and 11.
-
Requires a fast internet connection.
Method 2: Using Rufus (Works With Any Windows ISO)
Rufus is a lightweight third-party tool known for its speed and versatility.
Step-by-Step Guide
-
Download Rufus
-
Go to https://rufus.ie and download the latest version.
-
-
Prepare USB Drive
-
Plug in your USB drive.
-
Backup data because Rufus will format the drive.
-
-
Open Rufus
-
No installation is needed; just double-click the executable.
-
-
Configure Settings
-
Under Device, choose your USB drive.
-
Under Boot selection, click SELECT and browse for your Windows ISO file.
-
Under Partition scheme, choose:
-
GPT for UEFI systems (most modern PCs).
-
MBR for BIOS/Legacy systems.
-
-
File system should be NTFS for Windows.
-
-
Start the Process
-
Click Start.
-
Rufus will warn you about formatting—click OK to proceed.
-
Wait for the process to finish.
-
Pros:
-
Fast and lightweight.
-
Supports older versions of Windows.
-
Offers advanced options.
Cons:
-
Slightly more technical.
Method 3: Using Command Prompt (Advanced Manual Method)
This method is useful when tools are not available or you want full control.
Step-by-Step Guide
-
Open Command Prompt
-
Run cmd.exe as administrator.
-
-
Launch DiskPart
-
List Disks
Identify your USB drive (e.g., Disk 1).
-
Select USB Drive
-
Clean the Drive
-
Create a New Partition
-
Format the Partition
-
Assign a Letter
-
Make It Bootable
-
Exit DiskPart:
-
Use the bootsect tool from your ISO:
Replace X with your USB drive letter.
-
-
Copy Windows Files
-
Mount the ISO or extract it.
-
Copy all files to the USB drive manually.
-
Pros:
-
No third-party tools.
-
Works in recovery or offline environments.
Cons:
-
Time-consuming.
-
Easy to make a mistake.
4. How to Boot From the USB Drive
Once you’ve created the bootable USB, follow these steps to install Windows:
Step-by-Step
-
Insert USB Drive into the target computer.
-
Restart the PC.
-
Enter BIOS/UEFI (press keys like F2, F12, DEL, or ESC depending on manufacturer).
-
Change Boot Order to prioritize USB.
-
Save and Exit BIOS.
-
The system should boot from the USB and show the Windows installation screen.
5. Common Issues and Fixes
| Issue | Solution |
|---|---|
| USB not booting | Recheck boot order, use a different USB port (preferably USB 2.0) |
| Installation stuck | Use a different ISO or USB drive |
| Media Creation Tool crashes | Run it as administrator or try another PC |
| “Missing drivers” error | Use Rufus and make sure ISO is correct |
| PC doesn’t recognize USB | Try formatting the USB again and recreate it |
6. Tips for a Smooth Installation
-
Use a USB 3.0 Drive: Faster write speeds make both creation and installation quicker.
-
Keep ISO Updated: Older ISO files might be missing critical updates or drivers.
-
Back Up Data: The USB creation process will erase existing data.
-
Use GPT for UEFI: Modern systems use UEFI firmware, which works best with GPT partitioning.
-
Disconnect Other Drives: Prevent accidental formatting during Windows installation.
7. Frequently Asked Questions (FAQs)
Q1: Can I reuse the USB drive after installation?
Yes, but you’ll need to format it before storing new files.
Q2: Do I need a product key to install Windows?
You can skip entering a key during installation. Windows will prompt you to activate it later.
Q3: Can I install Windows on a Mac using a bootable USB?
Yes, but the process involves additional steps with Boot Camp or Parallels.
Q4: How long does the USB creation process take?
Typically 10–30 minutes depending on your system and USB drive speed.
Q5: What file format should the USB drive be in?
NTFS is preferred, but some UEFI systems may require FAT32.
8. Final Thoughts
Creating a bootable USB drive for Windows installation is an essential skill for any PC user, IT technician, or enthusiast. Whether you’re performing a fresh installation, troubleshooting a system, or helping others, this guide equips you with all the methods and tips you need to get the job done.
Among the available methods, Microsoft’s Media Creation Tool is best for most users due to its simplicity. Rufus is ideal for users needing flexibility, and the Command Prompt method is great for advanced users or when no GUI tools are available.
With the right tools and approach, you can install Windows quickly, safely, and efficiently—anytime, anywhere.


